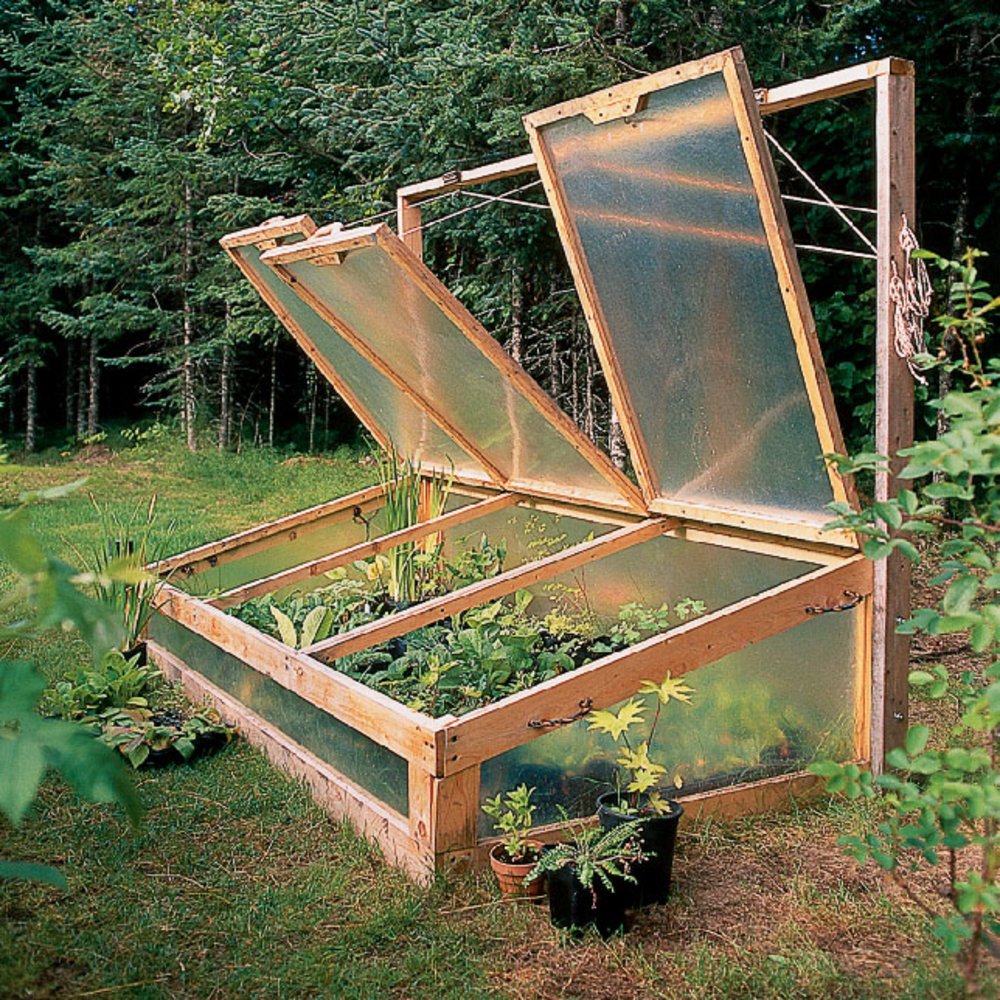
Building a Cold Frame to Protect Your Vegetables
A cold frame is a simple and effective way to extend the growing season for your vegetables. It acts as a miniature greenhouse, providing a sheltered environment where plants can thrive even in cool or frosty weather. By trapping solar heat and protecting plants from wind and cold, a cold frame allows you to start seeds earlier in spring, extend the harvest into autumn, and even grow vegetables year-round in milder climates. This guide will walk you through the process of building a cold frame from scratch, ensuring you have a sturdy and functional structure to nurture your plants.
Choosing the Right Location
The location of your cold frame is crucial to its success. Consider the following factors:
Sunlight
A cold frame needs plenty of sunlight to heat up and provide energy for plant growth. Choose a spot that receives at least six hours of direct sunlight daily, ideally facing south for maximum exposure. Avoid locations shaded by trees or buildings.
Drainage
Good drainage is essential to prevent waterlogging and root rot. Select a location with well-drained soil or create a raised bed to ensure water can flow freely.
Accessibility
Choose a location that is easily accessible for tending to your plants. Consider the proximity to your home, water sources, and tools.
Materials and Tools
To build a cold frame, you'll need the following materials:
- Framing Material: Wood (e.g., cedar, redwood, pressure-treated lumber) or metal (e.g., aluminum, galvanized steel) are popular choices. Choose materials resistant to rot and decay.
- Glazing: Glass, polycarbonate panels, or acrylic sheets are suitable options. Glass offers excellent light transmission but is heavy and can break. Polycarbonate is lighter, more durable, and offers better insulation.
- Hardware: Screws, hinges, clips, and brackets for attaching the glazing to the frame. Select materials that are weather-resistant.
- Soil: Choose a well-draining potting mix or amend existing soil with compost or other organic matter.
- Optional: A layer of insulation (e.g., foam board) for added warmth, a ventilation system for regulating temperature, a bottom frame to raise the cold frame off the ground for better drainage.
You'll also need these tools:
- Saw
- Drill
- Screwdriver
- Level
- Measuring tape
- Safety glasses
- Gloves
Construction Steps
Once you have your materials and tools, follow these steps to build your cold frame:
1. Design and Measure
Determine the size and shape of your cold frame. A standard cold frame is typically 3 to 4 feet wide and 6 to 8 feet long, but you can adjust these dimensions based on your needs and available space. Create a simple design sketch and measure the dimensions of the frame and glazing material.
2. Build the Frame
Cut the framing material to the desired length and width. Use a saw to make clean, precise cuts. Join the pieces together using screws or other appropriate hardware to create a rectangular or square frame. Use a level to ensure all sides are square and straight.
3. Attach the Glazing
Cut the glazing material to size, allowing for a slight overlap. Use hinges to attach the glazing to the frame on one side, creating a hinged lid. Secure the other side using clips, brackets, or screws. Make sure the glazing is firmly attached and weatherproof.
4. Add Ventilation
Ventilation is crucial for regulating temperature and preventing moisture buildup. You can install a simple ventilation system by adding a small, hinged opening at the top of the frame. You can also create ventilation by propping open the lid slightly during warmer weather.
5. Prepare the Base
Create a base for your cold frame by building a simple wooden frame or using concrete blocks or bricks. The base should be level and slightly raised off the ground to improve drainage.
6. Fill with Soil
Fill the cold frame with a good quality potting mix or amend your existing soil with compost and other organic matter. Ensure the soil is well-draining and provides adequate nutrients for your plants.
Tips for Using Your Cold Frame
Here are some tips for using your cold frame effectively:
- Start Seeds Early: Use your cold frame to start seeds indoors 4 to 6 weeks before the last frost date. This gives your seedlings a head start and allows them to grow strong before transplanting outdoors.
- Extend the Season: Extend your harvest by planting cold-hardy vegetables in the fall and winter. The cold frame will protect your plants from frost and cold temperatures, allowing you to enjoy fresh produce even when the weather turns chilly.
- Monitor Temperatures: Keep an eye on the temperature inside your cold frame, especially during extreme weather conditions. You may need to open the lid or add insulation to regulate the temperature and protect your plants.
- Water Regularly: Water your plants regularly, especially during dry weather. Be careful not to overwater, as this can lead to root rot.
- Provide Ventilation: Open the lid of your cold frame on warm days to allow for ventilation and prevent overheating. Close the lid in the evenings to trap heat.
- Clean Regularly: Clean your cold frame periodically to remove debris and pests. This will help prevent diseases and promote healthy plant growth.
Conclusion
Building a cold frame is a rewarding and cost-effective way to extend your gardening season. By following these steps and tips, you can create a sturdy and functional structure that will provide a warm and protective environment for your vegetables. Enjoy the benefits of fresh, homegrown produce all year long.
0 comments:
Post a Comment