Pages

Wednesday, November 20, 2024

Essential Tools for Cutting Dado Joints in Woodworking

Essential Tools for Cutting Dado Joints in Woodworking

Essential Tools for Cutting Dado Joints in Woodworking

Dado joints are a strong and visually appealing way to join two pieces of wood. They involve creating a groove, or "dado," in one piece of wood that perfectly fits a corresponding "tongue" on the other piece. This method of joining wood is used in various woodworking projects, from furniture to shelves to picture frames. To cut dado joints accurately and efficiently, you need a specific set of tools. This article will guide you through the essential tools for cutting dado joints in woodworking.

Essential Tools for Cutting Dado Joints

The tools you'll need to cut dado joints will depend on the project's size and complexity. However, some tools are essential, whether you're a beginner or an experienced woodworker.

Table Saw

A table saw is one of the most versatile tools for cutting dado joints. It allows you to cut precise, consistent dados across the entire width of a workpiece. You'll need to use a dado stack, which is a specialized set of saw blades designed for cutting wide grooves.

Dado Stack

A dado stack consists of a set of saw blades stacked together to create the desired dado width. The blades are held together by a special arbor and spacer system, allowing you to adjust the width of the dado by adding or removing spacers. You'll need a dedicated dado stack set that is specifically designed for your table saw.

Router

A router is a highly versatile tool that can be used to cut dado joints, particularly when working on smaller pieces or with irregular shapes. A router with a dado bit can precisely cut dados along a guide rail.

Dado Bit

Dado bits are specialized router bits designed to create dado grooves. They have multiple cutting edges, allowing them to produce a wide and even dado. These bits come in various sizes, so you can choose the one that best suits your project's requirements.

Router Table

A router table provides a stable platform to mount a router and use dado bits for cutting dado joints. This allows you to cut dado joints with greater precision and control.

Measuring Tools

Precision is crucial when cutting dado joints. You'll need accurate measuring tools, such as a ruler, tape measure, and combination square, to ensure that your dadoes are cut to the correct dimensions.

Marking Tools

To accurately position your dado cuts, you'll need marking tools like a pencil, marking gauge, and combination square to clearly mark the location and dimensions of your dados.

Safety Gear

As with any woodworking project, safety should always be your top priority. Essential safety gear includes safety glasses, ear protection, dust mask, and work gloves.

Choosing the Right Tool for Your Needs

The best tool for cutting dado joints depends on your individual needs and the project's requirements. Here are some factors to consider:

  • The size and width of the dado
  • The material you're working with
  • Your experience level
  • The accuracy required for your project

If you're working on a large project and need to cut wide dados, a table saw with a dado stack will be your best option. However, if you need to cut dado joints in smaller pieces or with irregular shapes, a router with a dado bit may be a better choice.

Conclusion

Cutting dado joints can be a rewarding and satisfying aspect of woodworking. Whether you're a beginner or a seasoned craftsman, the tools outlined in this article will help you cut accurate and precise dado joints for a successful woodworking project. Remember, practice makes perfect, and with the right tools and a little patience, you'll be cutting perfect dado joints in no time.
Read More..

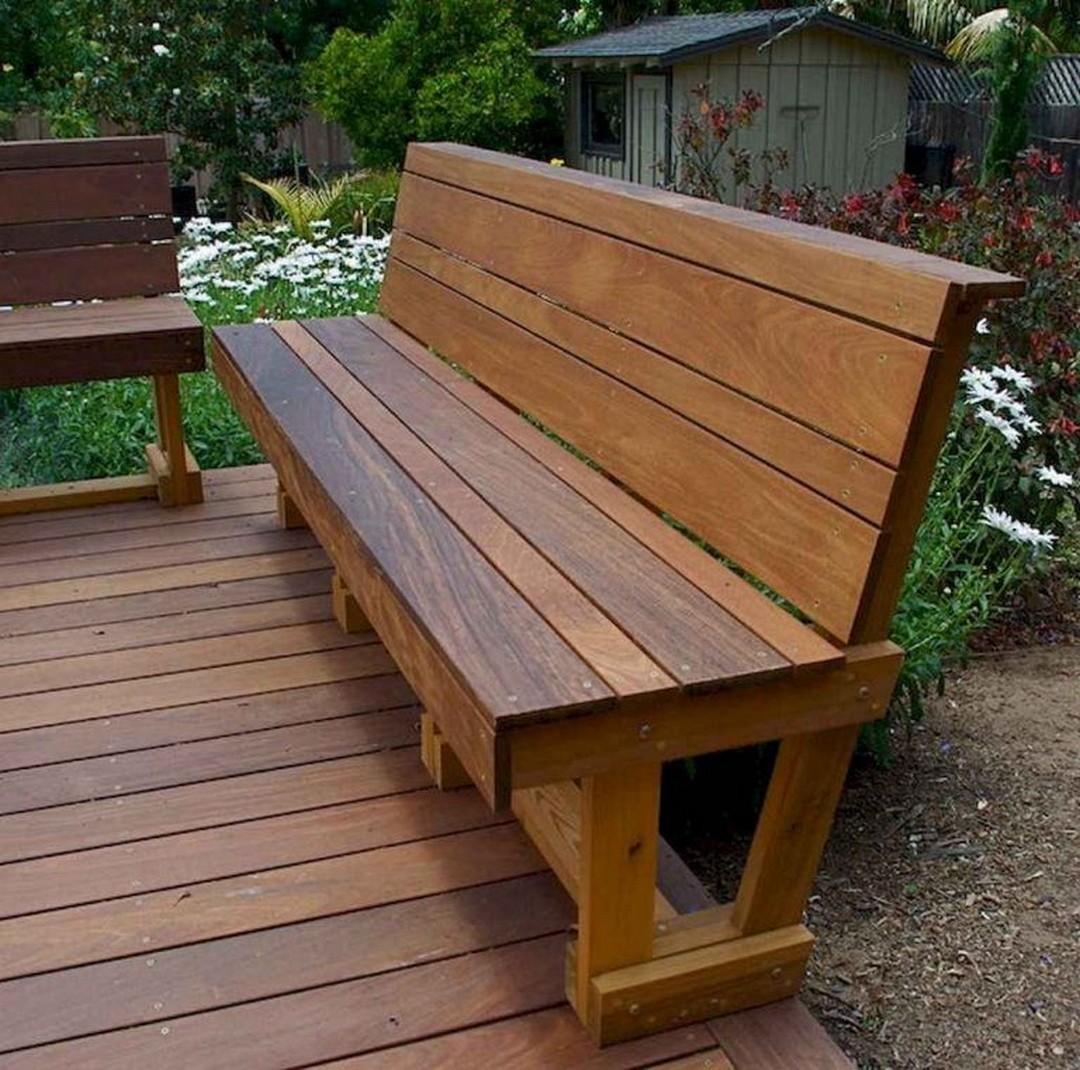
Wooden Outdoor Benches with Built-In Tables or Drink Holders for Extra Functionality

Wooden Outdoor Benches with Built-In Tables or Drink Holders for Extra Functionality

Wooden Outdoor Benches with Built-In Tables or Drink Holders: Elevating Your Outdoor Space

Outdoor benches are timeless additions to any garden, patio, or backyard, providing a welcoming space for relaxation, conversation, and enjoying the beauty of nature. While traditional benches offer comfortable seating, modern designs often incorporate additional functionalities to enhance the user experience. Wooden outdoor benches with built-in tables or drink holders are gaining popularity for their practicality and stylish appeal, transforming these simple seating arrangements into multi-functional hubs for outdoor living.

Benefits of Wooden Outdoor Benches with Built-in Tables or Drink Holders

These innovative bench designs offer a multitude of advantages that elevate their appeal beyond basic seating:

Increased Functionality and Convenience

The integrated tables or drink holders provide a dedicated space for placing beverages, snacks, books, or other items, eliminating the need for separate tables or trays. This convenient design keeps everything within easy reach, enhancing the overall comfort and usability of the bench.

Enhanced Socialization and Gathering

Built-in tables encourage social interaction by providing a common surface for sharing food, drinks, and conversation. The shared space fosters a sense of togetherness and creates a more engaging atmosphere for outdoor gatherings.

Space-Saving Solutions

These benches are ideal for smaller outdoor areas where space is limited. The integrated features eliminate the need for separate tables or chairs, maximizing the available space and creating a more efficient and organized layout.

Aesthetic Appeal

Wooden outdoor benches with built-in tables or drink holders come in a variety of styles and finishes to complement any outdoor décor. The integration of these features adds a touch of sophistication and elegance, enhancing the visual appeal of the space.

Types of Wooden Outdoor Benches with Built-in Features

The versatility of wooden outdoor benches with built-in features allows for a wide range of designs to cater to different preferences and needs.

Benches with Built-in Tables

These benches typically feature a small table attached to the back or side of the bench, providing ample surface area for drinks, snacks, or decorative items. Some designs even include built-in storage compartments under the table for added convenience.

Benches with Drink Holders

These benches are designed with built-in cup holders or small shelves along the armrests or sides, offering a secure and accessible place for beverages. This feature is particularly convenient for outdoor events or gatherings where keeping drinks within reach is essential.

Combination Benches with Tables and Drink Holders

Some benches combine the best of both worlds, incorporating both tables and drink holders for maximum functionality. These designs offer a comprehensive solution for all your outdoor needs, providing ample surface space and secure beverage storage.

Materials and Construction

Wooden outdoor benches with built-in features are crafted from a variety of durable materials designed to withstand the elements.

Wood Species

Popular wood species used for these benches include:

  • Teak: Known for its durability, weather resistance, and rich golden hue.
  • Cedar: Renowned for its natural oils that repel insects and decay.
  • Ipe: Highly dense and durable, offering exceptional longevity.
  • Redwood: Resists rot and decay, known for its natural reddish-brown color.

Construction Techniques

The construction of these benches often involves:

  • Mortise and Tenon Joints: Strong and durable joints that create a sturdy and long-lasting structure.
  • Screws and Bolts: Securely fasten the various components of the bench.
  • Gluing: Enhances the strength and durability of the joints.

Design Considerations

When selecting a wooden outdoor bench with built-in features, consider the following design elements:

Size and Capacity

Choose a bench that comfortably accommodates the desired number of people. Consider the overall dimensions of the bench to ensure it fits the available space.

Style and Aesthetics

Select a design that complements the existing outdoor décor and personal preferences. Consider the shape, color, and finish of the bench to ensure it blends seamlessly with the surrounding environment.

Comfort and Ergonomics

Look for benches with comfortable seat heights and backrests for optimal support and relaxation. Consider the overall design and contouring of the seating area to ensure it promotes a comfortable and enjoyable experience.

Maintenance Requirements

Different wood species require varying levels of maintenance. Consider the long-term care requirements, including sealing, staining, or cleaning, to ensure the longevity of the bench.

Conclusion

Wooden outdoor benches with built-in tables or drink holders offer a practical and stylish solution for enhancing outdoor living spaces. These multi-functional pieces combine the comfort of traditional benches with the convenience of additional features, creating a welcoming and versatile hub for relaxation, socializing, and enjoying the outdoors.

Read More..

How to Create Eco-Friendly Wooden Storage Bins to Sell

How to Create Eco-Friendly Wooden Storage Bins to Sell

Creating Eco-Friendly Wooden Storage Bins for Sale

In a world increasingly conscious of environmental sustainability, the demand for eco-friendly products has surged. Wooden storage bins, crafted from sustainable materials and employing ethical production practices, are a perfect example of this trend. This guide will walk you through the process of creating and selling eco-friendly wooden storage bins, catering to a market that values both functionality and environmental responsibility.

Sourcing Sustainable Materials

The foundation of eco-friendly wooden storage bins lies in the selection of sustainable materials. Opting for wood sourced from responsibly managed forests is paramount. Look for certifications like:

  • Forest Stewardship Council (FSC): This certification guarantees that the wood comes from forests managed according to strict environmental and social standards.
  • Sustainable Forestry Initiative (SFI): SFI certification ensures that the wood originates from forests that are sustainably managed and support biodiversity.
  • Programme for the Endorsement of Forest Certification (PEFC): PEFC promotes sustainable forest management practices worldwide.

Beyond wood, consider using eco-friendly finishes. Instead of conventional paints and varnishes, explore options like:

  • Natural oils: Linseed oil, tung oil, and walnut oil provide a durable finish and are free from harmful chemicals.
  • Beeswax: Beeswax is a natural, water-resistant sealant that gives a warm, subtle sheen.
  • Water-based paints: Choose low-VOC (volatile organic compound) water-based paints to minimize emissions.

Designing for Durability and Functionality

Eco-friendly doesn't mean sacrificing quality or functionality. Design your storage bins to be durable, versatile, and aesthetically pleasing. Consider the following:

Durability

  • Wood Selection: Choose sturdy hardwoods like oak, maple, or walnut for their strength and durability. These woods will resist wear and tear over time.
  • Joints and Construction: Use robust joinery techniques like mortise and tenon, dovetail, or pocket-hole joinery for a secure and long-lasting construction.
  • Finish: A high-quality, eco-friendly finish will protect the wood from scratches, stains, and moisture, extending its lifespan.

Functionality

  • Size and Shape: Offer a range of sizes and shapes to cater to diverse storage needs. Consider bins for toys, clothes, books, and other household items.
  • Handles and Lids: Incorporate sturdy handles for easy lifting and optional lids for dust protection.
  • Stackability: Design bins with smooth sides and flat tops for easy stacking, maximizing space efficiency.

Aesthetics

  • Natural Beauty: Embrace the natural beauty of wood by showcasing its grain patterns and texture. Consider using wood stains to enhance the natural color.
  • Simple and Modern Design: Opt for a timeless, minimalist design that complements various home styles.
  • Personalization: Offer customization options, allowing customers to choose wood type, stain color, and even personalized engravings.

Production Process and Ethical Considerations

Producing eco-friendly wooden storage bins requires a conscious approach to every step of the process.

Production Methods

  • Local and Sustainable Manufacturing: Prioritize local manufacturers to minimize transportation emissions and support local communities.
  • Low-Impact Tools and Techniques: Use power tools and machinery that minimize noise and air pollution.
  • Waste Reduction: Minimize waste by using efficient cutting techniques and repurposing wood scraps.

Ethical Considerations

  • Fair Labor Practices: Ensure that all workers involved in the production process are treated fairly and ethically.
  • Environmental Compliance: Adhere to environmental regulations and strive to minimize the environmental impact of your production process.
  • Transparency: Be transparent about your sourcing practices, production methods, and environmental impact.

Marketing and Sales

Marketing eco-friendly wooden storage bins effectively requires highlighting their sustainability benefits and appealing to environmentally conscious consumers. Here are some strategies:

Highlighting Sustainability

  • Certifications: Prominently display your sustainable certifications (FSC, SFI, PEFC) to demonstrate your commitment to environmental responsibility.
  • Materials and Process: Clearly communicate the sources of your materials and describe the eco-friendly production methods used.
  • Environmental Benefits: Emphasize the benefits of using natural, durable, and reusable products.

Targeting the Right Audience

  • Online Marketplaces: List your bins on platforms like Etsy, Amazon Handmade, and Shopify, which attract environmentally conscious shoppers.
  • Social Media: Utilize platforms like Instagram, Pinterest, and Facebook to showcase your products and connect with potential customers.
  • Local Events: Participate in craft fairs, farmers markets, and other local events to promote your bins to a targeted audience.

Pricing and Packaging

  • Competitive Pricing: Research the market to establish fair and competitive pricing that reflects the quality and sustainability of your bins.
  • Eco-Friendly Packaging: Use recycled and biodegradable packaging materials to reduce your environmental footprint.
  • Product Photography: Use high-quality photography to showcase the natural beauty and craftsmanship of your storage bins.

Conclusion

Creating and selling eco-friendly wooden storage bins is a rewarding endeavor that combines craftsmanship, sustainability, and business opportunity. By sourcing responsible materials, employing ethical production practices, and marketing effectively, you can tap into a growing market of environmentally conscious consumers who appreciate both functionality and environmental responsibility.

Read More..

Monday, November 18, 2024

Easy-to-Make Wooden Items That Shoppers Love

Easy-to-Make Wooden Items That Shoppers Love

Easy-to-Make Wooden Items That Shoppers Love

Hey there, crafty folks! Are you looking for woodworking projects that are easy to make and will sell like hotcakes? You've come to the right place! I'm gonna spill the tea on some super popular wooden items that are not only easy to whip up, but also guaranteed to attract shoppers.

Let's face it, there's something about the warmth and natural beauty of wood that just draws people in. It's timeless, versatile, and can be used to create an endless array of stunning pieces. Plus, with the right tools and a little know-how, even beginners can craft beautiful wooden items that people will adore.

Simple Wooden Decor

Let's start with some easy-peasy decor items. These are perfect for beginners and can be customized to match any style.

Rustic Wooden Signs

These are a classic! You can paint them, stain them, or leave them natural. Just add a cute saying, a quote, or even a personalized message and you've got a unique piece of decor.

  • Tip: Use stencils to create intricate designs or lettering. You can even find pre-made wooden blanks at craft stores.
  • Wooden Coasters

    Who doesn't love a set of cute coasters? You can make them in various shapes, sizes, and styles. Cut circles, squares, or even intricate shapes like stars or hearts.

  • Tip: Use wood burning techniques to add a unique design or create patterns. You can also use epoxy resin to add a splash of color.
  • Wooden Wall Shelves

    Simple, functional, and stylish! Floating shelves are perfect for adding storage space and displaying decorative items. You can make them in different sizes and finishes to suit your customers' needs.

  • Tip: Use reclaimed wood or pallet wood to add a rustic touch. You can also add metal brackets for a modern look.
  • Wooden Gifts

    Handmade wooden gifts are always a huge hit! They're thoughtful, unique, and show that you put extra effort into choosing the perfect present.

    Personalized Wooden Jewelry Boxes

    These are perfect for storing jewelry and other small trinkets. You can customize them with a name, a special date, or a monogram.

  • Tip: Use different types of wood to create a unique look, like walnut for a luxurious feel.
  • Wooden Picture Frames

    Everyone loves a good picture frame! You can create them in various sizes, shapes, and styles.

  • Tip: Add embellishments like decorative wood trim or hand-painted details to give them a personal touch.
  • Wooden Keychains

    These are small, easy to make, and can be customized with initials, logos, or even funny sayings.

  • Tip: Use wood burning to create intricate designs or add a personal touch. You can also attach small leather strips for a rustic look.
  • Functional Wooden Items

    Want to create something that's both beautiful and practical? Here are some functional wooden items that shoppers will love:

    Wooden Cutting Boards

    These are essential for any kitchen! You can make them in various shapes, sizes, and with different wood types.

  • Tip: Use food-safe finishes like mineral oil to seal the wood and protect it from moisture.
  • Wooden Utensil Holders

    These are a handy way to keep kitchen utensils organized and within reach. You can make them in various sizes and styles, and even add decorative elements like handles or engraved designs.

  • Tip: Use a variety of woods like cherry or maple to add a pop of color and texture.
  • Wooden Utensils

    Spoons, spatulas, and even rolling pins can be made from wood! These are eco-friendly alternatives to plastic or metal utensils, and they can be beautifully finished with a natural oil or beeswax.

  • Tip: Use different types of wood for different utensils to create a unique set.
  • Tips for Selling Your Wooden Items

    Now that you've got some awesome ideas for wooden items to create, here's how to get them out there and into the hands of shoppers:

    Promote Your Products Online

    Create an online shop on platforms like Etsy or Shopify to showcase your handcrafted wooden goods.

  • Tip: Take high-quality photos of your items to make them look their best!
  • Attend Local Craft Fairs and Markets

    Get face-to-face with potential customers at craft fairs and markets.

  • Tip: Offer samples or mini versions of your products to give people a taste of your craftsmanship.
  • Engage on Social Media

    Use Instagram, Facebook, or TikTok to share behind-the-scenes glimpses of your woodworking process and create a community of followers.

  • Tip: Run contests, giveaways, or discount codes to attract new customers.
  • Commonly Asked Questions

    What kind of wood should I use for my projects?

    The type of wood you choose will depend on your project. For beginners, softwoods like pine or fir are easier to work with. For more durable projects, you can use hardwoods like oak, maple, or walnut.

    What tools do I need for woodworking?

    You'll need basic tools like a saw, a drill, a sander, and a measuring tape. As you become more experienced, you can invest in more specialized tools.

    How do I finish my wooden items?

    There are many ways to finish wood, from sanding and staining to painting and varnishing. The finish you choose will depend on the look you want to achieve.

    So there you have it, folks! A whole bunch of easy-to-make wooden items that are guaranteed to be a hit with shoppers. Now get out there, unleash your inner woodworker, and create some beautiful things!

    Read More..

    Wednesday, November 13, 2024

    Free Woodworking Plans for Beginners: Simple and Fun Projects to Try

    Free Woodworking Plans for Beginners: Simple and Fun Projects to Try

    Free Woodworking Plans for Beginners: Simple and Fun Projects to Try

    Embark on a journey into the world of woodworking with these easy-to-follow plans, perfect for beginners. From functional shelves to charming decorative pieces, these projects will ignite your creativity and introduce you to the joys of crafting with wood. Let's get started!

    Why Choose Woodworking?

    Woodworking is more than just a hobby; it's a rewarding and versatile skill. It offers a sense of accomplishment as you transform raw materials into beautiful and useful creations. The tactile nature of working with wood is inherently satisfying, and the process itself can be incredibly therapeutic. Plus, the possibilities are endless! Whether you're building furniture, crafting home décor, or creating custom gifts, woodworking allows you to express your individual style and unleash your inner artist.

    Essential Tools for Beginners

    Before you dive into your first project, gather some basic tools to make your woodworking journey smoother. Here's a list to get you started:

    • Measuring Tape: Essential for accuracy.
    • Hand Saw: For cutting wood to length.
    • Hammer: For driving nails and assembling projects.
    • Screwdriver Set: For securing joints and attaching hardware.
    • Clamps: For holding pieces together while gluing or attaching.
    • Sandpaper: For smoothing surfaces and creating a polished finish.
    • Safety Glasses: Always wear safety glasses to protect your eyes from flying debris.

    As you progress, you can gradually expand your tool collection to tackle more complex projects.

    Simple Woodworking Projects for Beginners

    Ready to get your hands dirty? These beginner-friendly projects will guide you through the basics and build your confidence.

    Wooden Coasters

    Start with a project that's both functional and visually appealing. Wooden coasters are a great way to learn basic cutting, sanding, and finishing techniques. You can choose from various wood types and customize them with different stains or paints. Online resources offer numerous free plans for coasters, providing detailed instructions and cut lists.

    Simple Picture Frame

    Create a personalized frame for your favorite photograph or artwork. This project involves basic joinery, using mitered corners or simple butt joints. You can experiment with different wood species, finishes, and embellishments like decorative molding or stained glass.

    Small Wooden Shelf

    Build a small shelf to showcase your favorite trinkets or plants. Choose a simple design with straight edges and minimal cuts. This project will teach you about attaching brackets or cleats to create a sturdy shelf. Experiment with different finishes to match your home décor.

    Wooden Cutting Board

    Create a practical and stylish cutting board for your kitchen. This project requires cutting wood to size, sanding it smooth, and applying a food-safe finish. Choose hardwoods like maple or walnut for durability and a beautiful grain pattern.

    Tips for Success

    As you embark on your woodworking journey, keep these tips in mind:

    • Start Small: Begin with simple projects to build your skills and confidence.
    • Read the Plans Carefully: Understand each step before you begin working.
    • Measure Twice, Cut Once: Accuracy is key in woodworking. Double-check your measurements to avoid mistakes.
    • Practice Safety: Always wear safety glasses and use proper tools and techniques.
    • Enjoy the Process: Embrace the journey and take pride in your accomplishments.

    Woodworking is a rewarding and fulfilling hobby that can be enjoyed by all ages. These beginner-friendly projects will ignite your creativity and open up a world of possibilities. So, grab your tools, choose a plan, and get ready to bring your woodworking dreams to life!

    Read More..

    Tuesday, November 12, 2024

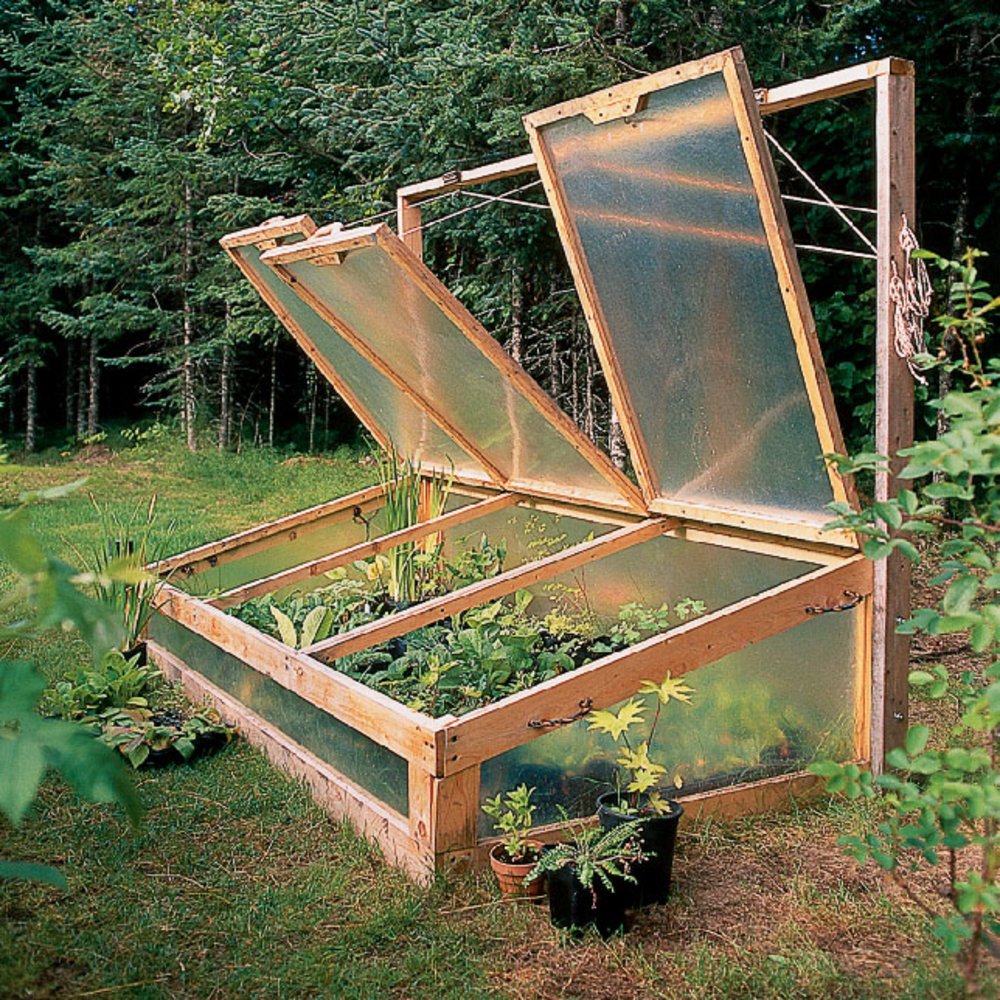
    Building a Cold Frame to Protect Your Vegetables

    Building a Cold Frame to Protect Your Vegetables

    Building a Cold Frame to Protect Your Vegetables

    A cold frame is a simple and effective way to extend the growing season for your vegetables. It acts as a miniature greenhouse, providing a sheltered environment where plants can thrive even in cool or frosty weather. By trapping solar heat and protecting plants from wind and cold, a cold frame allows you to start seeds earlier in spring, extend the harvest into autumn, and even grow vegetables year-round in milder climates. This guide will walk you through the process of building a cold frame from scratch, ensuring you have a sturdy and functional structure to nurture your plants.

    Choosing the Right Location

    The location of your cold frame is crucial to its success. Consider the following factors:

    Sunlight

    A cold frame needs plenty of sunlight to heat up and provide energy for plant growth. Choose a spot that receives at least six hours of direct sunlight daily, ideally facing south for maximum exposure. Avoid locations shaded by trees or buildings.

    Drainage

    Good drainage is essential to prevent waterlogging and root rot. Select a location with well-drained soil or create a raised bed to ensure water can flow freely.

    Accessibility

    Choose a location that is easily accessible for tending to your plants. Consider the proximity to your home, water sources, and tools.

    Materials and Tools

    To build a cold frame, you'll need the following materials:

    • Framing Material: Wood (e.g., cedar, redwood, pressure-treated lumber) or metal (e.g., aluminum, galvanized steel) are popular choices. Choose materials resistant to rot and decay.
    • Glazing: Glass, polycarbonate panels, or acrylic sheets are suitable options. Glass offers excellent light transmission but is heavy and can break. Polycarbonate is lighter, more durable, and offers better insulation.
    • Hardware: Screws, hinges, clips, and brackets for attaching the glazing to the frame. Select materials that are weather-resistant.
    • Soil: Choose a well-draining potting mix or amend existing soil with compost or other organic matter.
    • Optional: A layer of insulation (e.g., foam board) for added warmth, a ventilation system for regulating temperature, a bottom frame to raise the cold frame off the ground for better drainage.

    You'll also need these tools:

    • Saw
    • Drill
    • Screwdriver
    • Level
    • Measuring tape
    • Safety glasses
    • Gloves

    Construction Steps

    Once you have your materials and tools, follow these steps to build your cold frame:

    1. Design and Measure

    Determine the size and shape of your cold frame. A standard cold frame is typically 3 to 4 feet wide and 6 to 8 feet long, but you can adjust these dimensions based on your needs and available space. Create a simple design sketch and measure the dimensions of the frame and glazing material.

    2. Build the Frame

    Cut the framing material to the desired length and width. Use a saw to make clean, precise cuts. Join the pieces together using screws or other appropriate hardware to create a rectangular or square frame. Use a level to ensure all sides are square and straight.

    3. Attach the Glazing

    Cut the glazing material to size, allowing for a slight overlap. Use hinges to attach the glazing to the frame on one side, creating a hinged lid. Secure the other side using clips, brackets, or screws. Make sure the glazing is firmly attached and weatherproof.

    4. Add Ventilation

    Ventilation is crucial for regulating temperature and preventing moisture buildup. You can install a simple ventilation system by adding a small, hinged opening at the top of the frame. You can also create ventilation by propping open the lid slightly during warmer weather.

    5. Prepare the Base

    Create a base for your cold frame by building a simple wooden frame or using concrete blocks or bricks. The base should be level and slightly raised off the ground to improve drainage.

    6. Fill with Soil

    Fill the cold frame with a good quality potting mix or amend your existing soil with compost and other organic matter. Ensure the soil is well-draining and provides adequate nutrients for your plants.

    Tips for Using Your Cold Frame

    Here are some tips for using your cold frame effectively:

    • Start Seeds Early: Use your cold frame to start seeds indoors 4 to 6 weeks before the last frost date. This gives your seedlings a head start and allows them to grow strong before transplanting outdoors.
    • Extend the Season: Extend your harvest by planting cold-hardy vegetables in the fall and winter. The cold frame will protect your plants from frost and cold temperatures, allowing you to enjoy fresh produce even when the weather turns chilly.
    • Monitor Temperatures: Keep an eye on the temperature inside your cold frame, especially during extreme weather conditions. You may need to open the lid or add insulation to regulate the temperature and protect your plants.
    • Water Regularly: Water your plants regularly, especially during dry weather. Be careful not to overwater, as this can lead to root rot.
    • Provide Ventilation: Open the lid of your cold frame on warm days to allow for ventilation and prevent overheating. Close the lid in the evenings to trap heat.
    • Clean Regularly: Clean your cold frame periodically to remove debris and pests. This will help prevent diseases and promote healthy plant growth.

    Conclusion

    Building a cold frame is a rewarding and cost-effective way to extend your gardening season. By following these steps and tips, you can create a sturdy and functional structure that will provide a warm and protective environment for your vegetables. Enjoy the benefits of fresh, homegrown produce all year long.

    Read More..

    Building a Custom Squirrel Den Box: PDF Guide

    Building a Custom Squirrel Den Box: PDF Guide

    Building a Custom Squirrel Den Box: A Comprehensive Guide

    For those who enjoy watching wildlife, a squirrel den box can be an enjoyable addition to your backyard. These cozy shelters provide a safe haven for squirrels, offering protection from predators and the elements. But why settle for a generic den box when you can craft a custom one that caters to your specific needs and aesthetic preferences? This guide will walk you through the process of building a custom squirrel den box, providing detailed instructions and tips for a successful build.

    Choosing the Right Materials

    The first step is selecting the right materials. Durability and weather resistance are paramount, so opt for materials that can withstand the elements. Here are some recommended options:

    • Wood: Cedar, redwood, and pressure-treated lumber are excellent choices for their natural resistance to rot and insects.
    • Plywood: Marine-grade plywood offers exceptional durability and water resistance, making it ideal for exterior construction.
    • Metal: Galvanized steel or aluminum can be used for the roof or other components, offering a long-lasting, weatherproof solution.

    Design and Construction

    Once you've chosen your materials, you can start designing your den box. Consider the following factors:

    • Size: The box should be spacious enough for the squirrel to move comfortably. A good size is around 12 inches wide by 12 inches deep by 16 inches high.
    • Entrance: The entrance hole should be about 3 inches in diameter, allowing easy entry and exit for the squirrel.
    • Ventilation: Include ventilation holes on the sides or back of the box to ensure proper air circulation.
    • Roof: The roof should overhang the sides to protect the entrance from rain.
    • Cleaning access: Consider adding a removable bottom or a hinged lid to make cleaning easier.

    Building the Box

    With your design finalized, you can start assembling the box. Follow these steps:

    1. Cut the lumber: Cut the wood pieces according to your design. Ensure the corners are square for a sturdy construction.
    2. Assemble the frame: Join the side and back panels using wood glue and screws. Ensure the joints are tight and secure.
    3. Add the front panel: Attach the front panel, leaving an opening for the entrance hole. You can use a jigsaw or a drill with a hole saw to create the entrance.
    4. Install the roof: Cut the roof panels to size and attach them to the frame. If using a hinged roof, add hinges and a latch for easy access.
    5. Add ventilation: Drill ventilation holes on the sides or back of the box. Avoid placing them near the entrance.
    6. Finish the box: Apply a weather-resistant finish to protect the wood from moisture and insects. You can use paint, stain, or sealant.

    Placement and Maintenance

    Once your custom den box is ready, choose a suitable location for it. Here are some considerations:

    • Height: Place the box at least 10 feet above the ground to prevent access by predators.
    • Shade: Avoid placing the box in direct sunlight, as it can get too hot inside. A shaded location is ideal.
    • Stability: Secure the box firmly to a tree or post to prevent it from falling.

    Finally, regular maintenance is crucial to keep your den box in good condition. Check it periodically for signs of damage, clean it out as needed, and replace any worn or damaged parts. By following these simple tips, you can provide squirrels with a safe and comfortable home in your backyard.

    Read More..

    Building a grill gazebo: how to make it a centerpiece of your yard

    Building a grill gazebo: how to make it a centerpiece of your yard

    Elevate Your Backyard with a Grill Gazebo: A Centerpiece of Outdoor Living

    Imagine this: the sun dips below the horizon, casting long shadows across your yard. You gather with friends and family, the air alive with laughter and the aroma of sizzling food. The centerpiece of it all? Your stunning grill gazebo, a sanctuary of comfort and style, where culinary adventures meet outdoor relaxation.

    A grill gazebo isn't just a shelter for your grill; it's a statement piece that transforms your backyard into an inviting oasis. It's an extension of your home, a place to connect, create memories, and savor the simple pleasures of outdoor living.

    Designing Your Dream Grill Gazebo

    Before you break ground, envision your ideal grill gazebo. What vibe are you going for? A rustic retreat? A modern oasis? A cozy cottage? Consider:

    Size and Shape

    Determine the size that comfortably accommodates your grill and guests. Think about the flow of traffic and ensure enough room for dining and socializing. Popular shapes include square, rectangular, and octagonal, each offering a unique aesthetic.

    Materials

    From durable wood to low-maintenance aluminum, materials dictate the style and longevity of your gazebo. Wood provides warmth and character, while aluminum offers weather resistance and sleekness. Don't forget about the roof! Choose from sturdy shingles, durable metal, or even a retractable awning for flexibility.

    Features and Amenities

    Elevate your gazebo experience with thoughtful additions. Integrate a bar area for entertaining, add a built-in smoker for adventurous grilling, or install a fireplace for cozy nights. Consider lighting options, from charming string lights to elegant sconces, to create ambiance after dark.

    Creating a Centerpiece

    Transform your grill gazebo from a mere structure into a captivating centerpiece with these design tips:

    Landscaping and Hardscaping

    Frame your gazebo with lush landscaping. Plant vibrant flowers, fragrant herbs, or even a small vegetable garden to create a welcoming entrance. Add a paved patio or a charming stone walkway to enhance the visual appeal and provide easy access.

    Furniture and Decor

    Select comfortable and stylish outdoor furniture that complements the gazebo's design. Consider a dining table and chairs for group meals, comfy lounge chairs for relaxation, or a cozy seating area with a fire pit. Add pops of color with throw pillows, blankets, and vibrant outdoor rugs.

    Lighting

    Illuminate your gazebo to create a magical atmosphere. Install pendant lights or string lights over the dining area, and place lanterns or sconces around the perimeter for a soft glow. These lighting touches transform your gazebo into a magical haven, even after the sun sets.

    Embrace Outdoor Living

    Your grill gazebo is more than just a structure; it's an invitation to enjoy the great outdoors. Host cookouts, gather with friends, and create lasting memories under its welcoming roof. Let the warmth of the grill, the laughter of your loved ones, and the beauty of your backyard become the heart of your home.

    So, start planning today and let your grill gazebo become the centerpiece of your outdoor living space. It's a project that promises to bring joy, comfort, and countless unforgettable moments for years to come.

    Read More..

    How to Make a Birdhouse with a Sustainable Design

    How to Make a Birdhouse with a Sustainable Design

    Building a Birdhouse: Sustainable Style for Feathered Friends

    Hey there, bird lovers! Want to welcome some feathered friends to your backyard while also being eco-conscious? Well, you've come to the right place. Let's talk about building a birdhouse that's both a cozy home for birds and kind to the planet.

    Choosing the Right Materials

    The first step in building a sustainable birdhouse is choosing the right materials. We want to go for options that are durable, safe for birds, and have minimal environmental impact. Here are some great choices:

    Recycled and Upcycled Wood

    This is a fantastic way to give old wood a new life. Look for reclaimed lumber from construction sites, old furniture, or even pallets. You can often find these at a fraction of the cost of new wood, and you're diverting materials from landfills! Just be sure to give it a good scrub and let it dry completely before using it. You’ll want to make sure there are no leftover chemicals or nails that could harm the birds.

    Sustainable Wood

    If you're going for new wood, opt for sustainably harvested options like cedar, redwood, or cypress. These woods are naturally resistant to rot and insects, making them durable and long-lasting. Look for certifications like the Forest Stewardship Council (FSC) which ensures that the wood was sourced from responsibly managed forests.

    Bamboo

    This fast-growing, renewable resource is a fantastic choice for birdhouse construction. Bamboo is lightweight, strong, and naturally resistant to moisture. It can be easily worked with and comes in various sizes.

    Other Eco-Friendly Options

    You can even get creative and use other sustainable materials like:

    • Cork
    • Recycled plastic (though make sure it's bird-safe and free of harmful chemicals)
    • Clay (great for a rustic look and can even be made into bird feeders)

    Design Tips for Bird-Friendly Birdhouses

    Now that we have our materials, let's talk about design. A birdhouse is not just a house, it's a safe haven for our feathered friends. Here are some tips to ensure your birdhouse is comfortable and welcoming:

    The Right Size

    The size of your birdhouse will depend on the type of bird you want to attract. Do your research! A quick online search for "birdhouse dimensions" will reveal a variety of recommended sizes for different bird species.

    Placement Matters

    Location, location, location! Your birdhouse should be placed at least 5 feet above the ground to protect it from predators and the elements. Choose a spot that receives shade during the hottest part of the day and is sheltered from strong winds.

    Ventilation is Key

    Birds need good ventilation to stay healthy and comfortable. You can add small ventilation holes on the sides or back of the birdhouse. Make sure they're large enough for air to circulate but not so large that they're a threat to young birds.

    Entry Hole Considerations

    The entry hole should be the right size for the birds you're trying to attract. A hole that's too large will make the nest vulnerable to predators, while a hole that's too small will discourage birds from entering. Generally, round holes are better than square ones because birds tend to enter and exit headfirst.

    Think About the Roof

    A pitched roof will help with drainage and prevent water from pooling inside. You can also add an overhang to the roof to create a bit of shelter from the elements.

    Building Your Birdhouse: Step-by-Step

    Alright, let's get our hands dirty and start building!

    1. Gather your materials. Remember, we're going for sustainable choices! Recycled wood, bamboo, or sustainably harvested wood are all great options.
    2. Cut your wood or bamboo to size. Use a saw and a measuring tape to create the pieces you need for the birdhouse. Refer to your chosen birdhouse design or plan.
    3. Assemble the birdhouse. Use wood glue, screws, or nails to secure the pieces together. Make sure to use appropriate fasteners for your chosen material.
    4. Cut the entry hole. Use a drill or a jigsaw to cut a hole that's the right size for your target bird species. Remember, round holes are usually better for birds.
    5. Add ventilation holes. Use a drill to create a few small ventilation holes on the sides or back of the birdhouse.
    6. Attach the roof. Make sure it's securely fastened and has a slight pitch for drainage.
    7. Sand the birdhouse. Sand the outside of the birdhouse to remove any rough edges or splinters.
    8. Apply a sealant. A water-based sealant will help protect the wood and ensure the birdhouse lasts longer. You can also use a natural oil like tung oil for a more natural finish.
    9. Choose a suitable location. Remember to place your birdhouse in a safe and sheltered location at least 5 feet off the ground.

    Birdhouse Maintenance

    Just like any home, your birdhouse will need a little TLC to keep it in tip-top shape for its feathered occupants. Here's what you need to do:

    • Clean the birdhouse annually. This will help prevent the spread of diseases and ensure a clean and healthy environment for the birds.
    • Inspect for damage. Check the roof, walls, and entry hole for any signs of wear and tear, and make repairs as needed.
    • Refill the bird feeder. If you've added a bird feeder to your birdhouse, be sure to keep it full of birdseed.

    Embrace the Joy of Birdwatching

    Now, sit back, relax, and enjoy watching your feathered friends settle into their new home. Remember, birdhouses are not just about providing shelter, they're about connecting with nature and appreciating the beauty of our feathered friends. Happy birdwatching!

    Read More..

    Build your own wooden magic box with simple steps

    Build your own wooden magic box with simple steps

    Constructing a Wooden Magic Box

    The allure of magic boxes, also known as secret compartments or hidden compartments, lies in their ability to conceal and reveal. Whether used for practical purposes or playful tricks, building your own wooden magic box offers a rewarding experience. This article will guide you through the process, outlining the necessary materials, tools, and step-by-step instructions to craft a functional and aesthetically pleasing magic box.

    Materials and Tools

    Before embarking on your magic box construction, gather the following materials and tools:

    Materials

    • Wooden planks: Choose wood that is suitable for your desired aesthetic and purpose. Pine, oak, or plywood are popular choices.
    • Hinges: Select hinges that match the size and weight of your box.
    • Latch or lock: A simple latch or a small lock can add security and intrigue.
    • Wood glue: Use a high-quality wood glue for strong bonds.
    • Wood screws: Choose screws that are appropriate for the wood thickness and hinge size.
    • Sandpaper: Use various grits for sanding the wood smooth.
    • Wood stain or paint (optional): Enhance the appearance of the box with your desired color or finish.
    • Clear coat (optional): Apply a protective clear coat to seal the wood and protect it from scratches and moisture.

    Tools

    • Saw: A hand saw or a circular saw is necessary for cutting the wood planks to size.
    • Measuring tape: Accurate measurements are crucial for precision.
    • Pencil: Mark your cuts and design features.
    • Clamps: Secure the wood pieces during assembly.
    • Screwdriver: Drive screws into the wood.
    • Drill: Create pilot holes to prevent wood splitting when screwing.
    • Sanding block or sander: Smooth the wood surfaces.
    • Brush: Apply stain or paint evenly.

    Designing Your Magic Box

    The design of your magic box is entirely up to your imagination. Consider the following factors when conceptualizing your creation:

    Size and Shape

    Determine the desired size and shape of your magic box. Will it be a small trinket box or a larger storage box? A rectangular or square shape is classic, but you can explore other shapes, such as round or hexagonal.

    Secret Compartment Design

    Think about the mechanism for hiding your secret compartment. Common methods include:

    • False bottom: A removable bottom panel conceals a hidden space underneath.
    • Sliding panel: A panel slides horizontally to reveal a compartment behind it.
    • Hidden drawer: A drawer that appears to be part of the box's exterior actually slides out to reveal a compartment.
    • Rotating mechanism: A section of the box rotates to reveal a hidden space.

    Exterior Features

    Consider adding decorative elements to enhance the appearance of your box, such as:

    • Inlays: Cut and insert pieces of different wood types or materials for a visually appealing contrast.
    • Carving: Add intricate carvings to personalize the box and create visual interest.
    • Hardware: Use unique handles, latches, or hinges to add a touch of character.

    Construction Steps

    Once you have designed your magic box, follow these steps for construction:

    Cut the Wood Pieces

    Using your saw and measuring tape, cut the wooden planks to the dimensions you have determined. Ensure precise cuts for a well-fitting box.

    Create the Secret Compartment

    Construct the secret compartment according to your chosen design. For a false bottom, cut a piece of wood slightly smaller than the box's base and attach it to the bottom of the box. For a sliding panel, cut a rectangular piece of wood that slides smoothly within the box's sides.

    Assemble the Box

    Glue and screw together the sides and bottom of the box. Clamp the pieces together while the glue dries for a strong bond. Apply wood glue to all joints before screwing.

    Install Hinges and Latch

    Attach the hinges to the box's lid and the corresponding positions on the box's body. Secure the latch or lock to the lid and the box's body.

    Sand and Finish

    Sand the box's surfaces thoroughly to achieve a smooth and polished finish. Use progressively finer grits of sandpaper. Apply wood stain or paint, if desired. Let the stain or paint dry completely.

    Apply a Clear Coat

    If you want to protect your magic box from scratches and moisture, apply a clear coat over the stained or painted surface. Follow the manufacturer's instructions for drying time.

    Adding a Magical Touch

    To enhance the mystique of your magic box, consider incorporating these features:

    • Hidden compartments within the secret compartment: Create an additional layer of secrecy by hiding a smaller compartment within the larger one.
    • Secret triggers: Design a hidden trigger, such as a lever or a pressure plate, that activates the secret compartment mechanism.
    • Illusions and tricks: Explore illusions or tricks that can be incorporated into your magic box, such as disappearing objects or changing compartments.

    Conclusion

    Building your own wooden magic box is a rewarding project that combines creativity and craftsmanship. By carefully planning your design, following the construction steps, and adding a touch of magic, you can create a unique and captivating box that will impress and entertain. Let your imagination soar and enjoy the process of bringing your magic box to life.

    Read More..

    DIY Guide to Building a Large Birdhouse for Bigger Birds

    DIY Guide to Building a Large Birdhouse for Bigger Birds

    DIY Guide to Building a Large Birdhouse for Bigger Birds

    Attracting a variety of birds to your backyard is a rewarding experience. While smaller birdhouses cater to common backyard species, larger birds often go overlooked. Building a spacious birdhouse tailored for bigger birds can bring an entirely new dimension to your avian sanctuary.

    This guide will walk you through the process of constructing a large birdhouse, considering the unique needs and preferences of larger bird species. By providing them with a suitable dwelling, you'll be contributing to their well-being and enriching your backyard ecosystem.

    Choosing the Right Birdhouse Design

    The first step in creating a welcoming home for larger birds is to select an appropriate birdhouse design. Consider the following factors:

    Bird Species

    Research the bird species you wish to attract and determine their specific requirements. For instance, woodpeckers need a deep cavity, while owls prefer an entrance hole high on the side. Familiarize yourself with the preferred nesting dimensions, entrance hole size, and overall structure.

    Materials

    Opt for durable materials that can withstand the elements. Cedar, redwood, or untreated pine are excellent choices. Avoid using treated lumber, as the chemicals can be harmful to birds. Ensure that all materials are free of knots and imperfections to prevent splintering.

    Design Considerations

  • Size: Larger birds need more space. Aim for a minimum interior height of 12 inches and a width of 10 inches. For species like wood ducks, the interior may need to be even larger.
  • Entrance Hole: The entrance hole should be large enough for the bird to enter and exit comfortably. Research the preferred size for your target species.
  • Ventilation: Proper ventilation is crucial to prevent moisture buildup and mold. Include ventilation holes on the sides or top of the birdhouse.
  • Drainage: Ensure that the bottom of the birdhouse slopes slightly to facilitate drainage. This will help prevent water from pooling inside.
  • Roof overhang: A generous overhang will protect the entrance from rain and snow.
  • Landing perch: Include a perch in front of the entrance hole to provide birds with a safe landing spot.
  • Gathering Materials and Tools

    Once you have finalized your birdhouse design, gather the necessary materials and tools. Here's a comprehensive list:

    Materials

  • 1x12 inch lumber (for the floor, sides, and roof)
  • 1x6 inch lumber (for the back and the front)
  • 1x4 inch lumber (for the perch)
  • Screws (1 1/2 inches and 2 inches)
  • Wood glue
  • Stain or paint (optional)
  • Weather-resistant sealant
  • Hardware cloth (for ventilation and predator protection)
  • Tools

  • Measuring tape
  • Saw (circular or hand saw)
  • Drill
  • Screwdriver
  • Level
  • Hammer
  • Safety glasses
  • Work gloves
  • Pencil or marker
  • Step-by-Step Construction Guide

    Let's dive into the construction process, step by step:

    1. Cutting the Lumber

    Cut the lumber to the following dimensions:

  • Floor: One piece of 1x12 inch lumber, cut to the desired width of the birdhouse.
  • Sides: Two pieces of 1x12 inch lumber, cut to the desired height of the birdhouse.
  • Back: One piece of 1x6 inch lumber, cut to the desired width of the birdhouse.
  • Front: One piece of 1x6 inch lumber, cut to the desired width of the birdhouse.
  • Roof: Two pieces of 1x12 inch lumber, cut to the length of the birdhouse and angled to create a sloped roof.
  • Perch: One piece of 1x4 inch lumber, cut to the desired length for the perch.
  • 2. Assembling the Birdhouse

  • Attach the sides to the floor: Apply wood glue to the edges of the floor and sides. Align the sides with the floor and secure them with screws.
  • Attach the back and front: Align the back and front pieces with the sides and floor. Secure them with screws and wood glue.
  • Attach the roof: Apply wood glue to the top edges of the sides. Align the roof pieces and secure them with screws. Be sure to overlap the roof pieces to ensure proper drainage.
  • Attach the perch: Drill a hole through the front panel and insert the perch. Secure the perch with a screw.
  • Cut the entrance hole: Measure and mark the entrance hole on the front panel. Use a saw to carefully cut out the entrance hole.
  • 3. Adding Ventilation and Predator Protection

  • Ventilation: Cut a small piece of hardware cloth and attach it to the back or sides of the birdhouse to create ventilation holes.
  • Predator Protection: Wrap the bottom of the birdhouse with hardware cloth to prevent predators from reaching inside.
  • Drainage: Ensure that the floor of the birdhouse slopes slightly towards the front to facilitate drainage.
  • 4. Finishing Touches

  • Stain or paint: If desired, stain or paint the birdhouse to protect the wood and enhance its appearance. Use water-based, non-toxic paints and stains that are safe for birds.
  • Weather-resistant sealant: Apply a weather-resistant sealant to the exterior of the birdhouse to protect it from moisture and the elements.
  • Installation: Choose a location for your birdhouse that is sheltered from wind and rain. Install the birdhouse using appropriate mounting hardware, ensuring that it is secure.
  • Enhancing Your Birdhouse

    Once your large birdhouse is complete, consider these additional touches to create a truly inviting habitat:

    Nesting Material

    Provide a small amount of nesting material inside the birdhouse, such as shredded bark, straw, or dried leaves. Avoid using synthetic materials as they can be harmful to birds.

    Placement and Maintenance

    Select a location that offers shelter from wind and rain. Keep the birdhouse clean and free of debris. Replace nesting material regularly to ensure a clean and safe environment for birds.

    Conclusion

    Building a large birdhouse for bigger birds is a rewarding project that allows you to attract a wider variety of feathered friends to your backyard. By following this comprehensive guide, you can create a welcoming and safe haven for these magnificent creatures, contributing to their well-being and enriching the biodiversity of your surroundings.

    Read More..

    DIY Birdhouse: How to Create One Using Salvaged Wood

    DIY Birdhouse: How to Create One Using Salvaged Wood

    Give Your Feathered Friends a Home: Building a Birdhouse with Salvaged Wood

    Tired of watching the same boring bird feeder? Want to attract a variety of birds to your backyard? Then it’s time to build a birdhouse! And what better way to do it than with salvaged wood? Not only will you be giving your feathered friends a cozy home, but you’ll also be doing your part for the environment by repurposing materials. Ready to get started? Follow these easy steps and soon you'll be welcoming a new generation of birds to your garden.

    Gather Your Supplies

    Before you start hammering and sawing, make sure you have all the necessary materials. You can find most of these at your local hardware store or even in your own garage.

    Here’s what you’ll need:

    • Salvaged wood (approximately 1/2 inch thick)
    • Saw (hand saw, circular saw, or jigsaw)
    • Hammer
    • Screwdriver or drill
    • Screws or nails
    • Measuring tape
    • Pencil
    • Sandpaper (fine grit)
    • Wood glue
    • Paint or stain (optional)

    Design Your Birdhouse

    Before you start cutting, take some time to sketch out your birdhouse design. Consider the type of birds you want to attract. Some popular birdhouse designs include:

    • Bluebird house: This classic design has a small, round opening and is typically painted blue.
    • Woodpecker house: Woodpeckers prefer houses with a large, rectangular opening.
    • Chickadee house: These small houses have a single, small entrance hole.

    You can also find plenty of birdhouse designs online for inspiration. Once you have a design in mind, measure your salvaged wood and transfer the measurements onto the wood using your pencil.

    Cutting and Assembling the Birdhouse

    Now it’s time to cut your wood! Use your saw to carefully cut out the pieces of your birdhouse. If you’re using salvaged wood, be sure to check for any cracks or knots that might make the wood weak. Once all the pieces are cut, you can start assembling your birdhouse.

    Start by attaching the sides of your birdhouse to the base. Use wood glue to secure the joints and then reinforce them with screws or nails. Next, attach the back panel to the sides and then add the roof. Leave a small gap between the roof and the back panel to allow for drainage. Finally, cut out the entrance hole for your birds.

    Finishing Touches

    Once the basic structure of your birdhouse is complete, it’s time to give it some personality! Use sandpaper to smooth out any rough edges and create a smooth, polished finish. You can also add some paint or stain to give your birdhouse a more attractive look. Remember, if you’re using paint, choose a non-toxic, bird-safe variety.

    Finally, add a perch for your feathered friends. You can use a small branch or create a perch out of salvaged wood. Attach the perch just below the entrance hole.

    Choosing the Perfect Location

    The location of your birdhouse is crucial for attracting birds. Here are some tips for finding the perfect spot:

    • Choose a location that provides shelter from the elements, such as a shady spot under a tree or bush.
    • Make sure the birdhouse is facing away from prevailing winds.
    • Place the birdhouse at least 5 feet off the ground to deter predators.
    • Avoid placing the birdhouse near busy areas or walkways.

    With a little effort, you can create a beautiful and functional birdhouse that will attract feathered friends to your backyard. So grab your salvaged wood and get creative!

    Read More..

    Step-by-Step Cold Frame Guide for Winter Gardening

    Step-by-Step Cold Frame Guide for Winter Gardening

    Build a Cold Frame for Winter Gardening Success

    Winter doesn't have to mean a complete halt to your gardening adventures. A cold frame, a simple yet ingenious structure, allows you to extend your growing season into the cooler months. Imagine harvesting fresh greens, starting seedlings, and nurturing tender plants â€" all through the heart of winter! This guide will walk you through the steps of building a cold frame, helping you turn your winter garden dreams into a reality.

    Understanding Cold Frames: A Mini Greenhouse

    A cold frame essentially acts like a miniature greenhouse. It traps solar heat and insulates the plants within, creating a microclimate warmer than the surrounding air. This allows you to grow a variety of cool-season crops, start seeds early, and even harden off seedlings before transplanting them outdoors.

    Materials for Your Cold Frame

    To build a basic cold frame, you'll need the following:

    • Wooden frame: Use pressure-treated lumber for longevity. Dimensions will vary depending on your needs, but a standard size is 4 feet wide by 6 feet long.
    • Glass or polycarbonate panels: These will cover the top of the frame to let in sunlight and trap heat. Glass is durable but heavy; polycarbonate is lighter and more impact-resistant.
    • Hinges: Attach the cover to the frame securely.
    • Handles or latches: For easy access and opening/closing.
    • Screws or nails: For assembling the frame and attaching the cover.
    • Soil: High-quality potting mix or garden soil enriched with compost.
    • Optional: Insulation (styrofoam or bubble wrap), ventilation materials (screens or vents), and a thermometer.

    Step-by-Step Cold Frame Construction

    Now, let's build your cold frame! Here's a detailed step-by-step guide:

    Step 1: Choose a Location

    Select a sunny spot in your garden. Ideally, the cold frame should receive at least 6 hours of direct sunlight each day. Ensure the area is well-drained to prevent waterlogging.

    Step 2: Assemble the Frame

    Cut your lumber to size and use screws or nails to construct a rectangular frame. The frame should be about 12-18 inches high. You can create a simple box shape or build a more elaborate design with angled walls for extra strength.

    Step 3: Attach the Cover

    Carefully measure and cut your glass or polycarbonate panels to fit the frame. Attach them securely using hinges and handles. Consider adding a vent to the cover for controlling ventilation and temperature.

    Step 4: Prepare the Soil

    Fill the inside of the cold frame with your chosen soil. A layer of compost will provide extra nutrients and improve drainage.

    Step 5: Insulation (Optional)

    For extra warmth during frigid temperatures, you can add insulation beneath the soil. This will further boost the cold frame's ability to hold heat.

    Caring for Your Cold Frame

    With your cold frame built, it's time to start growing! Here's how to maintain it for optimal results:

    Watering

    Monitor the moisture levels in your cold frame regularly. Water as needed, ensuring the soil is evenly moist but not waterlogged.

    Ventilation

    Temperature control is key. On warm days, open the cover to vent the frame and prevent overheating. On cold days, keep the cover closed to trap heat.

    Maintenance

    Clean the cover regularly to maximize light penetration. Remove any debris or leaves that could block sunlight.

    Winter Gardening with Your Cold Frame

    Now, the fun part! You can grow a variety of cold-hardy vegetables and greens in your cold frame. Here are some excellent choices:

    • Lettuce: A classic cold-weather crop that thrives in a cold frame.
    • Spinach: A nutritious leafy green that tolerates cold conditions.
    • Kale: A hardy green that can withstand even freezing temperatures.
    • Radishes: These quick-growing root vegetables are perfect for cold frame cultivation.
    • Carrots: You can even grow early-season carrots in your cold frame.
    • Broccoli: Start broccoli seedlings indoors and then transplant them to your cold frame.
    • Cauliflower: Similar to broccoli, cauliflower benefits from the protection of a cold frame.

    Don't hesitate to experiment with other cool-season crops. Enjoy fresh, homegrown produce throughout the winter, and discover the magic of cold frame gardening!

    Read More..

    How to make a diy wooden desk with a foldable top for storage

    How to make a diy wooden desk with a foldable top for storage

    Build a Foldable Desk for Space-Saving Storage

    Imagine a desk that transforms from a sleek work surface into a compact storage unitâ€"a dream for small spaces! This DIY project guides you through building a wooden desk with a foldable top, offering both functionality and style. Let's get started!

    Gather Your Materials

    Before diving into construction, assemble your materials:

    • Wood: Choose sturdy lumber like plywood or pine for the base and top. Consider the desired dimensions.
    • Hinges: Opt for heavy-duty hinges, at least two, to support the folding top.
    • Wood glue: For secure bonding.
    • Screws: Use screws of appropriate length for the wood thickness.
    • Sandpaper: To smooth surfaces and edges.
    • Stain or paint: For a personalized touch.
    • Finishing oil or wax: For protection and shine.
    • Measuring tape, pencil, and saw: For precise cutting.
    • Drill and drill bits: For pilot holes and attaching hardware.
    • Clamps: For holding pieces securely during assembly.

    Construction Steps

    Follow these steps to construct your folding desk:

    Step 1: Cut the Wood

    Measure and cut the wood according to your desired desk dimensions. You'll need two pieces for the base, two for the sides, and one for the top.

    Step 2: Assemble the Base

    Connect the two base pieces with wood glue and screws, forming a rectangular frame. Use clamps for secure adhesion.

    Step 3: Attach the Sides

    Attach the side pieces to the base frame using wood glue and screws. Make sure the sides are positioned vertically and flush with the base.

    Step 4: Install the Hinges

    Locate the hinge positions on the desk top and base. Mark the locations and drill pilot holes. Attach the hinges to the top and base using screws.

    Step 5: Sand and Finish

    Sand the entire desk, including the top, sides, and base, to achieve a smooth surface. Apply your chosen stain or paint. Let it dry completely before applying finishing oil or wax.

    Enjoy Your Foldable Desk

    Congratulations! Your foldable desk is ready to use. Now, you have a multi-functional space-saver that transforms from a practical work surface to a compact storage unit, offering versatility for any room.

    Remember, you can personalize your desk by adding decorative elements like drawer pulls or a custom handle for the folding top. Let your creativity shine!

    Read More..

    Free DIY Bedside Cabinet Plans for Every Skill Level (Downloadable)

    Free DIY Bedside Cabinet Plans for Every Skill Level (Downloadable)

    Free DIY Bedside Cabinet Plans for Every Skill Level (Downloadable)

    Looking to add some extra storage and style to your bedroom? Building a bedside cabinet is a fantastic DIY project that’s perfect for beginners and seasoned woodworkers alike. Not only can you save money by building it yourself, but you can also customize it to perfectly match your décor and needs.

    In this post, we’re going to walk you through everything you need to know to build a DIY bedside cabinet, from choosing the right materials and tools to finding free downloadable plans. We’ll also offer tips and tricks for beginners to make the process as smooth as possible. So, grab your tools, let's get started!

    Choosing the Right Bedside Cabinet Plan

    First things first, you need to choose the perfect bedside cabinet plan for your skills and style. There are tons of free plans available online, ranging in complexity from simple to advanced. Here's a quick guide to help you find the best fit:

    Beginner Projects

    If you're new to woodworking, start with a simple plan. Look for designs that:

    • Use basic joinery techniques like butt joints and pocket holes.
    • Involve minimal cuts and shaping.
    • Utilize pre-cut lumber for easier assembly.

    Some popular beginner-friendly bedside cabinet plans include:

    • **Simple Cube Cabinet:** This is a classic design that's easy to construct and can be customized with different finishes.
    • **Floating Shelf Cabinet:** This sleek and modern design requires minimal construction and offers a clean look.
    • **Rustic Pallet Cabinet:** If you love the reclaimed wood look, this plan is perfect for you!

    These plans can be found on websites like:

    • Ana White
    • The DIY Playbook
    • Instructables

    Intermediate Projects

    Once you’ve gained some experience, you can graduate to intermediate plans that introduce more challenging techniques. These might include:

    • **Dovetail joints:** A traditional joinery technique that adds strength and a beautiful aesthetic.
    • **Mortise and tenon joints:** Another strong and durable joinery method that's great for furniture making.
    • **Curved or angled pieces:** These require precise cutting and shaping skills.

    Some great intermediate bedside cabinet plans can be found on websites like:

    • Woodworking for Mere Mortals
    • Popular Woodworking
    • Fine Woodworking

    Advanced Projects

    For experienced woodworkers, there are many advanced plans that allow you to showcase your skills and create truly unique pieces. These plans might feature:

    • **Intricate carvings or inlays:** This requires a high level of skill and precision.
    • **Complex joinery techniques:** Explore advanced joinery methods like box joints or sliding dovetails.
    • **Custom-made hardware:** Design and build unique drawer pulls or door hinges.

    If you're looking for inspiration, check out websites like:

    • The Wood Whisperer
    • Woodworking Magazine
    • Fine Woodworking

    Materials and Tools You’ll Need

    The specific materials and tools you’ll need will depend on the design you choose. However, here's a list of common necessities for most bedside cabinet plans:

    Materials

    • **Lumber:** Pine, plywood, or hardwood are all great choices depending on your budget and desired look.
    • **Screws:** Wood screws of various lengths will be needed for assembly.
    • **Wood glue:** Use a high-quality wood glue to ensure strong joints.
    • **Finish:** Stain, paint, or varnish to protect your cabinet and give it a desired color and shine.
    • **Hardware:** Drawer slides, hinges, knobs, pulls, and any other hardware you need.

    Tools

    • **Saw:** A circular saw, miter saw, or table saw are essential for cutting lumber.
    • **Drill/Driver:** For drilling pilot holes and driving screws.
    • **Measuring tape:** For accurate measurements and cuts.
    • **Pencil:** For marking lines and transferring measurements.
    • **Sandpaper:** For smoothing surfaces and removing imperfections.
    • **Clamps:** For holding pieces together while gluing or assembling.
    • **Safety glasses:** Protect your eyes from sawdust and flying debris.
    • **Dust mask:** To protect your lungs from dust and particles.

    Tips for Beginners

    Here are some tips to help you create a beautiful and functional bedside cabinet, even if you’re a beginner:

    • **Read the plan carefully:** Before you start building, read the plan thoroughly and make sure you understand each step.
    • **Measure twice, cut once:** Accuracy is key in woodworking, so take your time and double-check your measurements.
    • **Use a jig:** Jigs can help you make accurate cuts and ensure your pieces are consistent.
    • **Practice on scrap wood:** Try out any new techniques or joinery methods on scrap wood before you start cutting into your final pieces.
    • **Don’t be afraid to ask for help:** If you’re struggling with a step, don’t hesitate to reach out to a more experienced woodworker for help.
    • **Take your time and enjoy the process:** Building a bedside cabinet is a rewarding experience, so relax and savor the journey.

    Finding Free Downloadable Plans

    Now, let’s talk about where you can find those amazing free plans! Here are some of our favorite websites:

    • **Ana White:** A popular resource for DIYers of all levels, Ana White offers a huge collection of free woodworking plans, including several great bedside cabinet options.
    • **The DIY Playbook:** This site features a wide variety of free woodworking plans for various projects, including beautiful and functional bedside cabinets.
    • **Instructables:** A platform for sharing DIY projects, Instructables has an extensive library of free bedside cabinet plans, ranging from simple to complex.
    • **Pinterest:** Search "DIY bedside cabinet plans" on Pinterest to find a wealth of inspiration and downloadable plans.
    • **Google:** Simply search "free bedside cabinet plans" on Google and you'll find countless results.

    Get Started and Enjoy the Process

    Building your own bedside cabinet is a fantastic way to personalize your bedroom and add a touch of craftsmanship to your space. Remember, there's no need to be intimidated by the process. With a little patience and the right resources, you can create a beautiful and functional piece of furniture that you’ll love for years to come. So, choose your plan, gather your materials, and get ready to build something amazing!

    Read More..

    How to Make a Birdhouse with a Stylish, Upcycled Roof

    How to Make a Birdhouse with a Stylish, Upcycled Roof

    Craft a Chic Birdhouse with a Stylish, Upcycled Roof

    Give your backyard a touch of whimsy and ecological charm by building a charming birdhouse. This project is not only rewarding but also a fantastic opportunity to repurpose materials and create a unique dwelling for feathered friends. We'll focus on building a birdhouse with a stylish, upcycled roof, transforming ordinary items into a beautiful and functional haven.

    Choosing Your Upcycled Roof

    The beauty of this project lies in its adaptability. Let your creativity guide you in selecting a unique material for the roof. Consider these options:

    • Metal lids: From coffee cans to tea tins, these come in various sizes and can be painted with vibrant colors.
    • Ceramic tiles: Broken tiles from a home improvement project can be arranged creatively for a mosaic-style roof.
    • Wood scraps: Leftover wood planks or shingles can be cut to size for a rustic and natural look.
    • Slate or stone: For a truly unique and enduring roof, consider using small slate or stone pieces.

    Preparing the Birdhouse Base

    The base of your birdhouse will provide the foundation for the roof and interior. You can use readily available materials like cedar, pine, or plywood.

    Step 1: Cut and Assemble the Base

    Using your chosen wood, cut four identical sides for the base. You can choose the dimensions based on your preference, keeping in mind that a smaller opening is better for attracting smaller birds. Once you've cut the sides, use wood glue and nails to secure them into a square or rectangular shape.

    Step 2: Create the Birdhouse Opening

    On one of the sides, cut a circular opening for the birds' entrance. The size of the opening is crucial for attracting specific species. Research common birds in your area and choose an appropriate size. Use a drill and a jigsaw to create a clean and smooth opening.

    Constructing the Upcycled Roof

    Now it's time to get creative with your upcycled roof. Follow these steps, adapting them to your chosen material.

    Step 1: Prepare the Roof Material

    Clean and prepare your chosen roof material. If using metal, remove any rust and paint it with a weather-resistant paint. If using ceramic tiles, clean them thoroughly and arrange them according to your design. For wood scraps, make sure they are smooth and free of splinters.

    Step 2: Attach the Roof

    Depending on your material, you'll need to create a secure attachment method. For metal lids, use hinges and screws to attach the lid to the base. For tiles, you can use a strong adhesive to glue them to a wooden frame that sits on top of the base. For wood scraps, attach them to the base using nails or screws.

    Finishing Touches for Your Birdhouse

    Once your birdhouse is complete, add some final touches to enhance its appeal:

    • Paint and decorate: Give your birdhouse a vibrant personality by painting it with cheerful colors. Consider painting a scene on the roof, or adding decorative elements like small bird cutouts.
    • Add a perch: Provide a resting spot for the birds by attaching a branch or a small wooden perch to the front of the birdhouse.
    • Install a drainage hole: Drill a small hole in the bottom of the birdhouse to allow water to drain and prevent mold growth.

    Finding the Perfect Location for Your Birdhouse

    Choose a spot for your birdhouse that provides protection from harsh weather and predators.

    • Seek shade: Place the birdhouse under a tree or bush to provide shade from the sun and rain.
    • Keep it high: Mount the birdhouse 5 to 10 feet above the ground to deter predators.
    • Consider the direction: Facing the entrance of the birdhouse towards the south or east will provide warmth and sunlight.

    With your upcycled birdhouse, you've created a welcoming sanctuary for birds while adding a stylish touch to your outdoor space. The joy of watching birds nest and raise their young is a reward in itself.

    Read More..

    How to build a grill gazebo with extra tall walls for protection

    How to build a grill gazebo with extra tall walls for protection

    Constructing a Tall-Walled Gazebo for Enhanced Grill Protection

    A grill gazebo offers a versatile outdoor space for grilling, dining, and entertaining. However, standard gazebo designs often lack sufficient wall height to provide comprehensive protection from the elements and insects. This article outlines a comprehensive guide for building a grill gazebo with extra-tall walls, ensuring optimal shelter and functionality for your outdoor culinary adventures.

    Planning and Design

    Determine Gazebo Dimensions and Location

    Begin by carefully considering the size and placement of your gazebo. Measure the grilling area and ensure sufficient space for comfortable movement and any additional equipment. Factor in the dimensions of your grill and any seating arrangements. Consider the ideal location for your gazebo, taking into account proximity to power outlets, water sources, and natural shade. Choose a flat, level surface that provides good drainage to prevent water accumulation.

    Select the Right Materials

    The choice of materials significantly affects the strength, longevity, and aesthetic appeal of your gazebo. Consider the following:

    • Frame: Aluminum or steel offer durability, while wood provides a more traditional look. Choose materials that resist rust and withstand weather conditions.
    • Roofing: A waterproof and weather-resistant material is essential. Consider options like polycarbonate, fiberglass, or vinyl.
    • Walls: Use privacy screens or solid panels for extra-tall walls. Select materials like vinyl, aluminum, or composite that provide protection from wind, rain, and insects.

    Design the Extra Tall Walls

    A key element of this project is designing and constructing the extra tall walls. Determine the desired height based on your needs for privacy, wind protection, and insect control. Consider the following factors:

    • Wall Height: Aim for at least 8-10 feet tall walls for maximum protection. Consider the height of your surrounding fencing or landscape features.
    • Wall Construction: Use solid panels or privacy screens to ensure adequate wind and rain protection. Choose materials that are durable and weather-resistant.
    • Ventilation: Incorporate ventilation features to prevent excessive heat buildup and maintain airflow. Consider retractable windows or open sections on the upper portion of the walls.

    Construction Process

    Prepare the Site

    Prepare the site by clearing debris, leveling the ground, and marking the dimensions for the gazebo base. Securely anchor the gazebo base to the ground using concrete footings or a reinforced base. Ensure proper drainage around the base to prevent water buildup.

    Assemble the Frame

    Follow the manufacturer's instructions carefully to assemble the frame. Begin by connecting the main posts, then add the roof supports and rafters. Ensure that all components are securely fastened using appropriate hardware. Maintain proper alignment and level throughout the construction process.

    Install the Roofing

    After completing the frame, install the roofing material. If using polycarbonate panels, cut them to size and secure them to the rafters using screws or clips. Ensure that the panels overlap slightly to create a waterproof seal.

    Construct the Tall Walls

    Build the extra tall walls by attaching the chosen panels or screens to the frame. Consider using vertical posts and horizontal rails to create a stable and robust structure. Secure the walls to the frame using screws, brackets, or clips. Incorporate any desired ventilation features or doors during this step.

    Finish and Detailing

    Once the frame, roofing, and walls are in place, complete the finishing touches. Add any desired accessories, such as a grill platform, shelves, or lighting fixtures. Consider applying a sealant or paint to protect the materials from the elements. Install screens or mosquito netting for additional insect protection.

    Tips and Considerations

    • Safety First: Always wear appropriate safety gear, such as gloves, eye protection, and hearing protection, while working with tools and materials.
    • Building Codes: Consult local building codes and regulations to ensure compliance with safety and structural requirements.
    • Wind Resistance: Consider the wind conditions in your area and choose appropriate materials and construction techniques to ensure stability.
    • Maintenance: Regularly inspect and maintain your gazebo to ensure its longevity and safety. Clean the roof and walls to prevent debris accumulation, and apply sealant as needed.

    Conclusion

    Building a grill gazebo with extra-tall walls offers a comprehensive solution for enhancing your outdoor cooking and entertaining experience. By following these steps, you can create a versatile and functional space that provides protection from the elements, insects, and privacy. Remember to prioritize safety, quality materials, and proper construction techniques for a lasting and enjoyable outdoor haven.

    Read More..

    Diy wooden gun box project: build a safe for your firearms

    Diy wooden gun box project: build a safe for your firearms

    DIY Wooden Gun Box Project: Build a Safe for Your Firearms

    Owning firearms comes with a responsibility to store them securely. A well-built gun box can provide peace of mind, ensuring your firearms are safe from unauthorized access and potential accidents. This guide will walk you through the process of building a sturdy and secure wooden gun box, perfect for safeguarding your valuable firearms.

    Project Overview

    This project involves constructing a wooden box with a secure locking mechanism. We will use high-quality materials and woodworking techniques to create a durable and aesthetically pleasing firearm storage solution. The specific dimensions and features can be customized to meet your individual needs.

    Materials and Tools

    Materials

    • Wood: 1/2 inch thick plywood or solid hardwood boards (consider using a species like oak, maple, or walnut for durability and aesthetic appeal)
    • Locking Mechanism: A heavy-duty lock and matching hasp
    • Hinges: Heavy-duty, concealed hinges
    • Wood Glue: High-quality wood glue for strong joints
    • Wood Screws: Suitable size and length for securing the box components
    • Finishing Materials: Stain, paint, or clear polyurethane for protection and aesthetics
    • Felt or Foam: For lining the interior of the box to protect your firearms

    Tools

    • Table Saw
    • Circular Saw
    • Miter Saw
    • Drill Press or Cordless Drill
    • Clamps
    • Measuring Tape
    • Pencil
    • Level
    • Safety Glasses
    • Dust Mask
    • Sandpaper
    • Screwdriver

    Construction Process

    Step 1: Design and Cut the Wood

    Begin by designing your gun box. Determine the desired dimensions based on the size of the firearms you intend to store. Consider the number of guns, their lengths, and any additional accessories you want to store within the box.

    Once you have a design, carefully measure and cut the plywood or hardwood boards to the required lengths using a table saw, circular saw, or miter saw. Ensure all cuts are accurate and precise for a smooth assembly.

    Step 2: Assemble the Box

    Use wood glue and screws to assemble the box frame. You can use rabbet joints, dado joints, or simple butt joints for stability. Apply a generous amount of glue to each joint and secure it with screws. Use clamps to ensure a tight fit and allow the glue to dry completely before moving to the next step.

    For added strength, consider using corner braces or metal plates to reinforce the joints. These can be purchased from hardware stores or online retailers.

    Step 3: Install the Locking Mechanism

    Once the box is assembled, carefully install the locking mechanism. Mark the location for the hasp on the box side. Use a drill press or cordless drill to create a recess for the hasp to fit flush with the wood. Secure the hasp using screws.

    Next, attach the lock to the inside of the box. Make sure the lock is positioned correctly and can easily engage with the hasp. Use screws to secure the lock in place.

    Step 4: Install the Hinges

    Choose heavy-duty concealed hinges for a clean and secure fit. Mark the locations for the hinges on the box lid and the box body. Use a drill press or cordless drill to create pilot holes for the hinge screws. Carefully attach the hinges using screws, ensuring that they are aligned properly.

    Step 5: Line the Interior

    To protect your firearms from scratches and impacts, line the interior of the box with felt or foam. Measure and cut the lining material to fit the inside of the box. Use a strong adhesive to secure the lining in place. Alternatively, you can use upholstery tacks or staples to attach the lining to the inside of the box.

    Step 6: Finishing Touches

    Before applying finishing touches, sand down the box thoroughly to smooth out any rough edges or imperfections. Use progressively finer grits of sandpaper for a smooth finish. Dust off the box with a clean cloth before applying the stain, paint, or polyurethane.

    Choose a finish that complements your style and preferences. You can stain the wood to enhance its natural color and grain pattern, or paint it with a solid color. For extra durability and protection, apply a clear polyurethane coating to the finished box. Allow each coat to dry completely before applying the next.

    Safety Considerations

    • Use Safety Glasses and Dust Mask: Wear safety glasses to protect your eyes from sawdust and debris. Use a dust mask to prevent inhaling harmful particles.
    • Proper Tool Handling: Always handle power tools with caution and ensure proper operation and maintenance. Read the manufacturer's instructions before using any tool.
    • Secure the Locking Mechanism: Choose a high-quality locking mechanism and install it securely. Use a strong key and keep it in a safe place.
    • Proper Firearm Storage: Store your firearms unloaded and separate from ammunition. Follow all local and federal laws regarding firearm storage.
    • Firearm Safety: Always treat firearms with respect and follow all safety protocols. Never point a firearm at anything you don't intend to shoot.

    Conclusion

    Building a custom wooden gun box is a rewarding project that can enhance your firearm storage security and organization. By following these steps and using high-quality materials and tools, you can create a sturdy and aesthetically pleasing box that will provide peace of mind for years to come. Remember to prioritize safety during construction and when handling your firearms.

    Read More..